Practical Camping Guide
How to Store Food While Camping
Store camping food in two separate systems: keep perishable food at 40°F (4°C) or below in a well-packed cooler, and secure every food or scented item from wildlife whenever it is not actively being used. At a developed campground, that may mean a provided food locker or a closed, locked hard-sided vehicle where local rules allow it. In the backcountry, use the exact approved method required for that area, often a certified bear-resistant container.
 By Danny WalkerUpdated 12 min read
Store camping food in two separate systems: keep perishable food at 40°F (4°C) or below in a well-packed cooler, and secure every food or scented item from wildlife whenever it is not actively being used. At a developed campground, that may mean a provided food locker or a closed, locked hard-sided vehicle where local rules allow it. In the backcountry, use the exact approved method required for that area, often a certified bear-resistant container.
Do not treat food safety and wildlife storage as the same problem. A latched bear locker can protect food from animals but does not refrigerate it. A normal cooler may hold a safe temperature but is not automatically bear-resistant. Your storage plan has to solve both problems at once.
The Three-Zone Food Storage System
The simplest reliable setup separates food into three zones before you leave home:
| Zone | What belongs there | Primary control |
|---|---|---|
| Cold zone | Meat, dairy, eggs, cut produce, cooked food and leftovers | Cooler at or below 40°F |
| Dry zone | Unopened shelf-stable food, bread, snacks, spices and cooking ingredients | Sealed bins plus wildlife-approved storage |
| Waste zone | Wrappers, scraps, used wipes, grease and leftovers being discarded | Leak-resistant trash bag or container, secured like food |
This avoids the common mistake of putting everything in one cooler. Dry goods stay dry, the cold cooler is opened less often, and trash cannot leak back into clean food. A separate drink cooler can further reduce openings during hot weather.
The system begins with a realistic menu. If you are still choosing meals, use what food to bring camping and then calculate quantities with how much food to bring camping. Less excess food means less refrigeration demand and less odor-producing waste.
Step 1: Check the Exact Local Rules
Look at the official land manager or campground page shortly before the trip. Rules can differ between adjacent campgrounds, frontcountry and wilderness zones, and different seasons. Some places require all food and scented items in a provided locker. Some allow storage in a hard-sided vehicle. Some wilderness areas require a specific bear-resistant canister from an approved list.
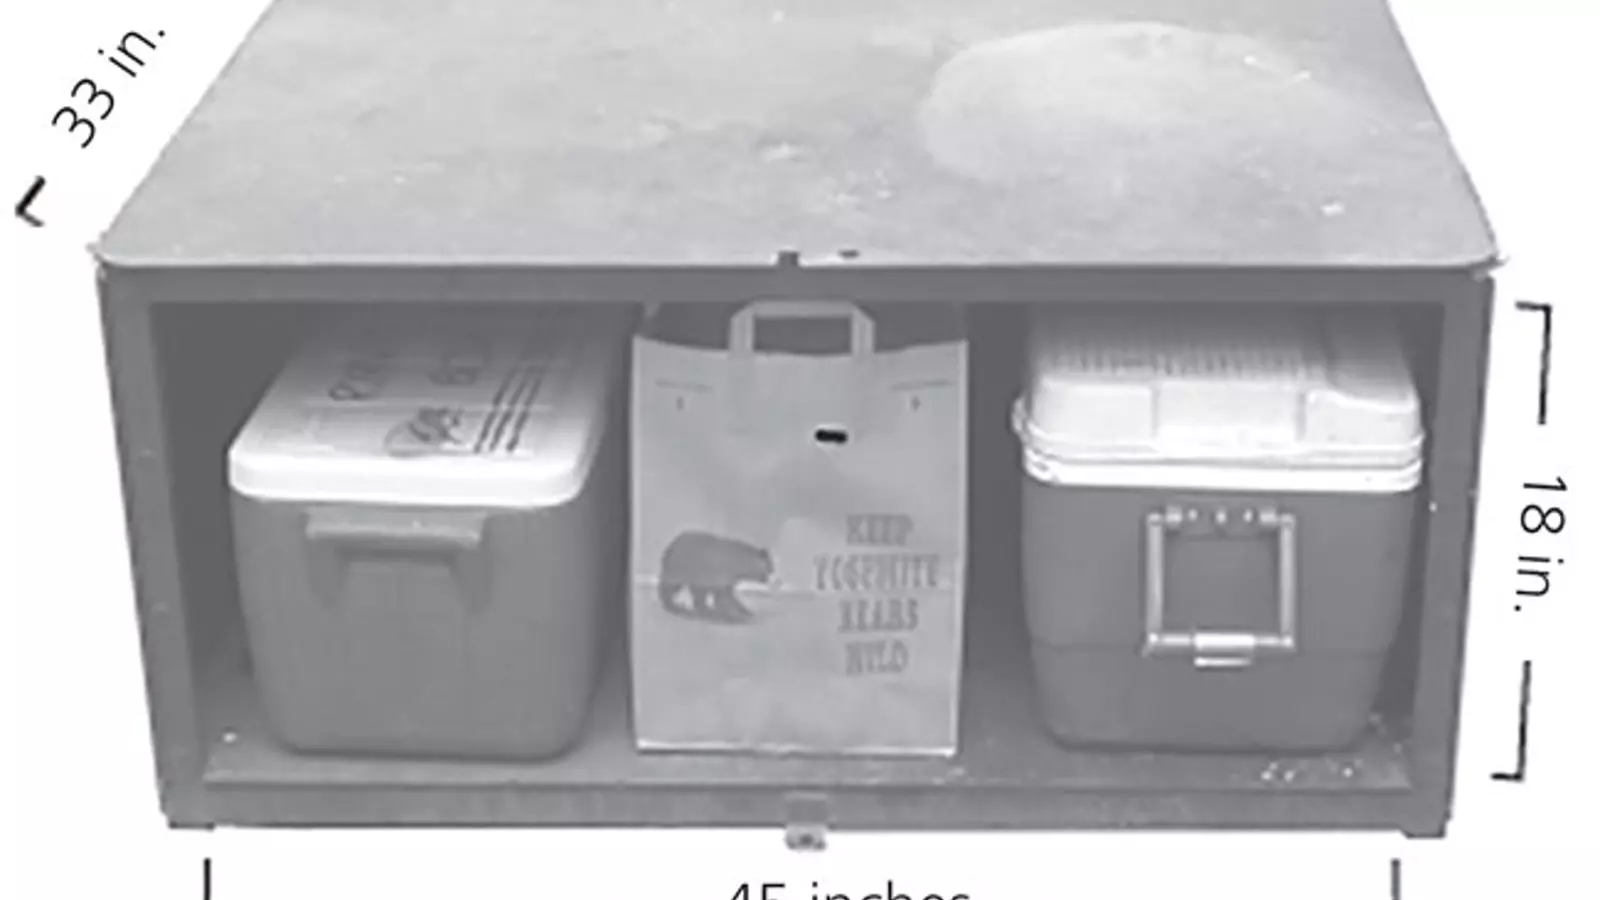
Write the rule into your trip plan; do not rely on a remembered rule from another park. Also check the locker dimensions before arriving with an oversized cooler. Shared lockers may fill up, and a personal padlock may be prohibited.
Treat the word “food” broadly. Wildlife attractants commonly include:
- Sealed and unsealed food.
- Beverages and drink containers.
- Coolers, cookware, stoves and grills with residue.
- Trash, recycling and empty packaging.
- Toothpaste, soap, sunscreen, lip balm and cosmetics.
- Pet food, bowls and treats.
- Medications or other scented products where local guidance includes them.
If it smells interesting to an animal, plan to secure it even if humans do not consider it food.
Step 2: Prepare Food at Home
Chill the refrigerator to 40°F or below and refrigerate ingredients before packing. Freeze foods that will be eaten later in the trip when their texture permits it. A cooler maintains cold much better than it cools warm groceries.
Pre-portion ingredients by meal. Remove unnecessary outer cartons but retain cooking instructions, allergen information, and use-by details. Put liquids and raw meat in truly leak-resistant containers; a thin grocery bag is not dependable containment.
Prepare raw ingredients on a clean surface. Use separate tools or thoroughly clean them between raw meat and ready-to-eat food. If you precook meals, cool them promptly in shallow containers before refrigerating rather than placing a large hot pot directly in the cooler.
Create a simple inventory with the meal, day, storage zone, and container. This is particularly useful for groups because people can find snacks without unpacking the raw-meat layer.
Step 3: Pack the Cooler in Meal Order
Start with a clean cooler. Add cold sources and already-cold food, filling open spaces so warm air does not circulate freely. USDA notes that block ice generally lasts longer than cubes, while cubes fill gaps well. Frozen water bottles or gel packs can supplement ice.
Pack in reverse order: later meals go lower and the first meal stays near the top. Place raw meat below ready-to-eat food even when it is sealed. Better still, use a dedicated food cooler or a rigid secondary container so a failure cannot drip onto fruit, cheese or cooked food.
Add a refrigerator-style thermometer where it can be read quickly. The target is 40°F (4°C) or below, not “the cooler still feels cool.” Keep the lid closed, shade the cooler, and cover it with a light-colored blanket or insulating layer without blocking any designed ventilation.
At camp, return cold ingredients immediately after serving. Perishable food should not remain between 40°F and 140°F for more than two hours, or more than one hour when the air temperature is above 90°F. Time is cumulative: several short periods on the table still add up.
For a complete cold-chain workflow, read how to keep food safe while camping.
Step 4: Build an Organized Dry-Food Bin
Use one or more rigid, lidded bins to keep packages organized and protect them from dust, rain and small spills. A dry-food bin is not necessarily animal-resistant, so it must still go into the locker, vehicle or approved backcountry system whenever it is unattended.
Group items by use: breakfast, trail snacks, dinner bases, drinks and condiments. Keep one day’s food accessible while the reserve remains sealed. Put flour, sugar, powdered mixes and opened packets into secondary containers. Label anything repackaged.
Choose package sizes you can finish. Once a can, pouch or jar is opened, the remaining food may require refrigeration even though the unopened product was shelf-stable. Our guide to camping food without refrigeration explains which foods reduce cooler dependence.
Step 5: Secure Food Every Time You Leave It
“Unattended” may mean walking to the restroom, not only leaving for a day hike. Close and latch a food locker completely. If local rules permit vehicle storage, close the windows, lock the doors, conceal attractants, and never assume an open pickup bed or soft-sided vehicle qualifies.
A retail label such as “bear resistant” does not override park rules. Certified containers work only when fully closed and used according to their instructions. A bear-resistant cooler may still have to be locked or placed in a locker at a particular campground.
Never keep food in a tent. A tent provides no meaningful wildlife barrier and puts the attractant beside sleeping people. Do not hide food under a tarp, hang a grocery bag from a low branch, or leave a cooler beside the picnic table overnight.
Step 6: Use the Required Backcountry Method
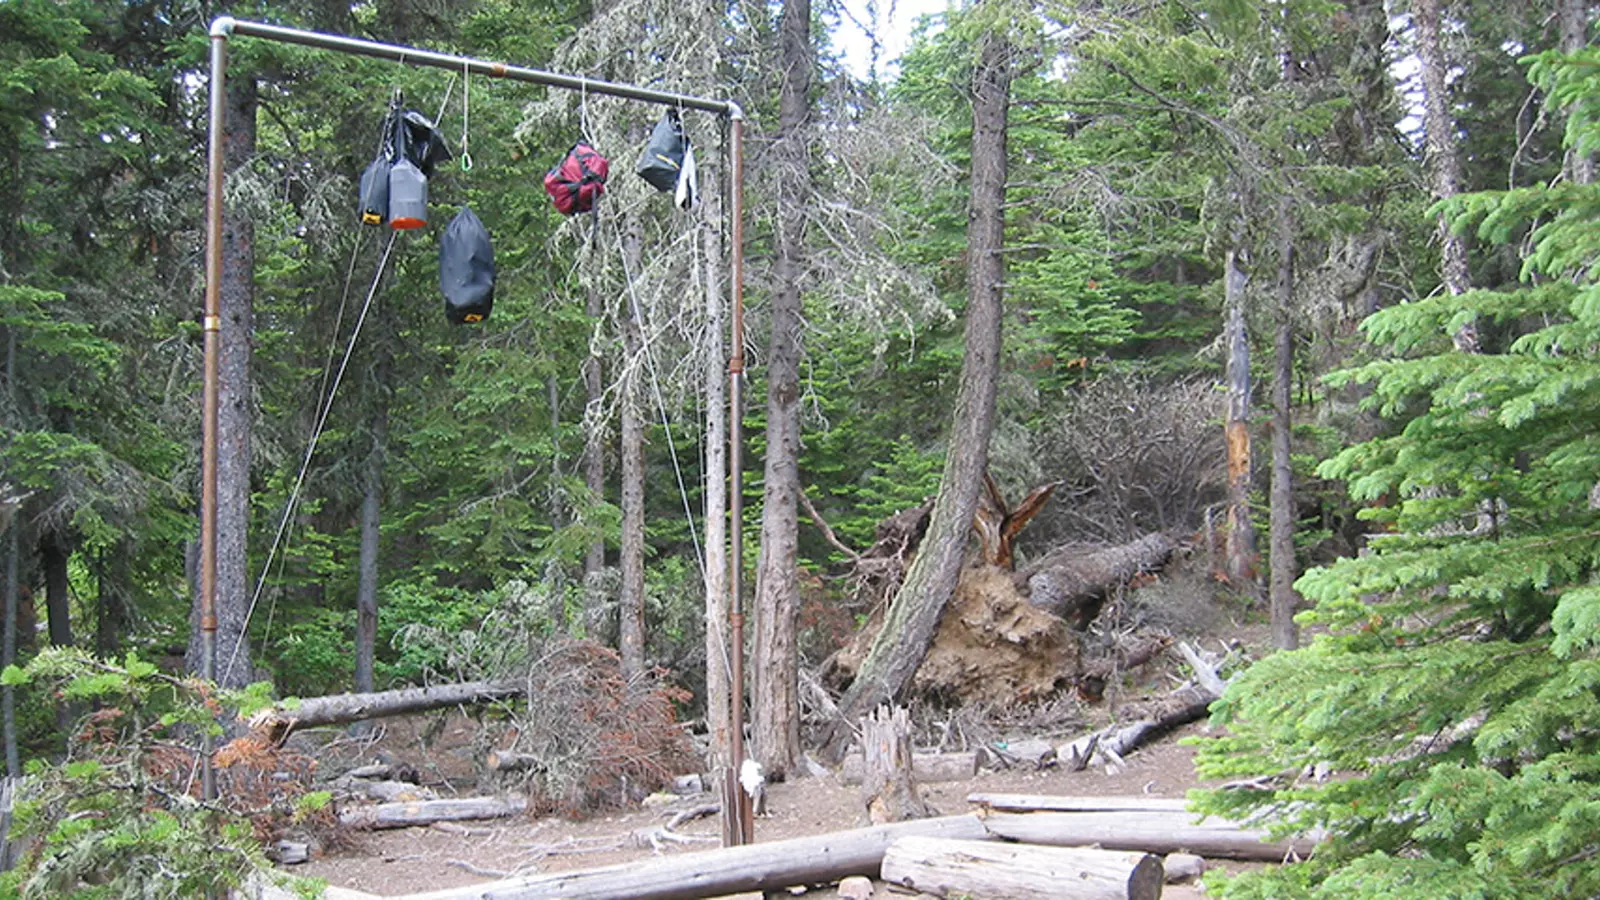
Backcountry food storage is destination-specific. A certified canister may be mandatory even where trees appear suitable for hanging. In other locations, a provided cable or pole is the designated method. Food hangs are allowed in some places but ineffective or prohibited in others.
When using a canister:
- Confirm that the exact model is accepted by the land manager.
- Pack all food, trash and regulated scented items inside.
- Close and lock it whenever food is not in your hands.
- Place it on stable, level ground at the required distance from camp.
- Keep it away from cliffs, steep slopes and water where an animal could roll it away.
- Do not attach a rope unless the manufacturer and local rules explicitly direct you to do so.
Do not copy a universal campsite-distance diagram from the internet. Terrain, designated sites and local rules determine where cooking and storage belong. Follow the current instructions on the permit or official park page.
Step 7: Control Leftovers, Dishwater and Trash
Decide whether leftovers can be cooled safely before you cook. Put small portions into clean, shallow containers and return them to a cooler that is still at or below 40°F. If cold holding is uncertain, discard the food; reheating does not reliably undo every hazard created by poor storage.
Collect scraps while cooking. Strain dishwater where required, pack out the captured solids, and dispose of water only according to local guidance. Do not dump grease or food water near the tent, fire ring, lake or stream. Do not burn leftovers or foil-lined packaging; incomplete burning leaves odors and debris.
Use a durable outer trash container or double-bag wet waste, then store it by the same wildlife rule as food. An empty wrapper still smells like a meal to an animal.
Before bed and before leaving camp, inspect the table, ground, stove, grill and fire area for crumbs, spills and dropped packaging. Clean cookware and secure it too. A clean-looking campsite can still contain grease and scented items.
Storage Plans for Common Scenarios
Two-night developed campground trip
Use a food cooler, optional drink cooler, dry bin and sealed trash container. On arrival, place every attractant in the provided locker unless actively cooking or eating. Keep the locker latched even while you are nearby. Cook the most perishable meal first.
Campground where vehicles are allowed for storage
Verify that the official rules permit this method. Put attractants out of sight in a locked hard-sided vehicle with all windows closed. Do not leave food on seats or move it into the tent for convenience.
Hot-weather family trip
Pre-chill two coolers, reserve one for food, and give the frequently opened drink cooler its own ice. Serve smaller quantities and replenish them rather than placing a full dish in the heat. Track both cooler temperature and cumulative time outside it.
Backpacking in required-canister country
Confirm the approved model and capacity before buying food. Repackage bulky dry foods while preserving instructions and labels. Check that the full first-day load fits at home; strapping overflow to the outside defeats the system.
Camping without reliable ice
Use perishables only while a verified cold source lasts, then shift to sealed shelf-stable meals. Design this transition before departure rather than gambling on food that merely feels cool.
Common Food-Storage Mistakes
Assuming the cooler is cold enough
Ice visible at one end does not prove every food is below 40°F. Use a thermometer and discard food when safe holding cannot be verified.
Treating sealed packages as odor-proof
Factory packaging may stop leaks but does not prevent wildlife from detecting an attractant. Store sealed snacks with the rest of the food.
Leaving the locker open during a meal
Wildlife can approach while people are present. Take out what you need, then latch the locker.
Packing raw meat above ready-to-eat food
A leaking container can contaminate everything below it. Isolate raw food and place it at the bottom.
Forgetting nonfood attractants
Toiletries, pet supplies, trash and dirty cookware belong in the storage plan, not in or beside the tent.
Depending on a improvised food hang
Trees may be unsuitable, technique may be poor, and hanging may violate local requirements. Check the destination and carry the approved system.
Pre-Trip Food Storage Checklist
- Read the current campground and wilderness storage rules.
- Confirm locker dimensions or reserve/rent an approved canister.
- Plan cooler, dry-food and waste zones.
- Pre-chill or freeze food and cold sources.
- Pack a cooler thermometer.
- Separate raw food from ready-to-eat food.
- Label repackaged ingredients and allergens.
- Bring leak-resistant leftover and trash containers.
- Plan clean water, handwashing and dishwater disposal.
- Verify that every scented item fits the approved storage space.
- Make the final meal shelf-stable if ice reliability is uncertain.
- Brief every camper on closing and latching the system.
Set up the physical workflow with how to set up a camp kitchen so clean food, raw ingredients, cooking and washing do not collide.
Frequently Asked Questions
Can I store food in my car while camping?
Only where the land manager permits it. Some developed campgrounds allow food inside a locked hard-sided vehicle with windows closed; other locations require lockers or approved containers. Soft-sided vehicles and open truck beds may not qualify.
Is a normal cooler bear-proof?
No. Insulation and sturdy latches do not automatically make a cooler an approved bear-resistant container. Follow the local rule and any certification or locking requirements.
How cold should a camping cooler stay?
Keep perishable food at 40°F (4°C) or below and verify it with a thermometer. If safe cold holding cannot be confirmed, use shelf-stable food and discard questionable perishables.
Should I keep food in my tent if there are no bears?
No. Raccoons, rodents and other wildlife can damage gear and learn to seek human food. Keep food and scented items out of the sleeping area and follow local instructions.
Does unopened food need wildlife-safe storage?
Yes. Sealed packaging is still an attractant and is commonly included in food-storage rules.
Where should I store trash overnight?
Use the same approved wildlife-secure method required for food until trash can go into a designated animal-resistant receptacle or be packed out.
Final Takeaway
A good camping food system protects temperature, people and wildlife at the same time. Pre-chill perishables, pack them below 40°F, separate raw from ready-to-eat food, organize dry goods, control waste, and secure every attractant whenever it is unattended. Most importantly, treat the destination’s current rules as the authority. The best container is the one that satisfies those rules, holds the entire scented load, and gets closed correctly every time.
Sources and Further Reading
- USDA Food Safety and Inspection Service, “Food Safety While Hiking, Camping & Boating.”
- National Park Service, “Cooking in Camp.”
- Yosemite National Park, “Food Storage While Backpacking.”
- Yosemite National Park, “Food Lockers.”
- Rocky Mountain National Park, “Food Storage at Campgrounds and Trailheads.”